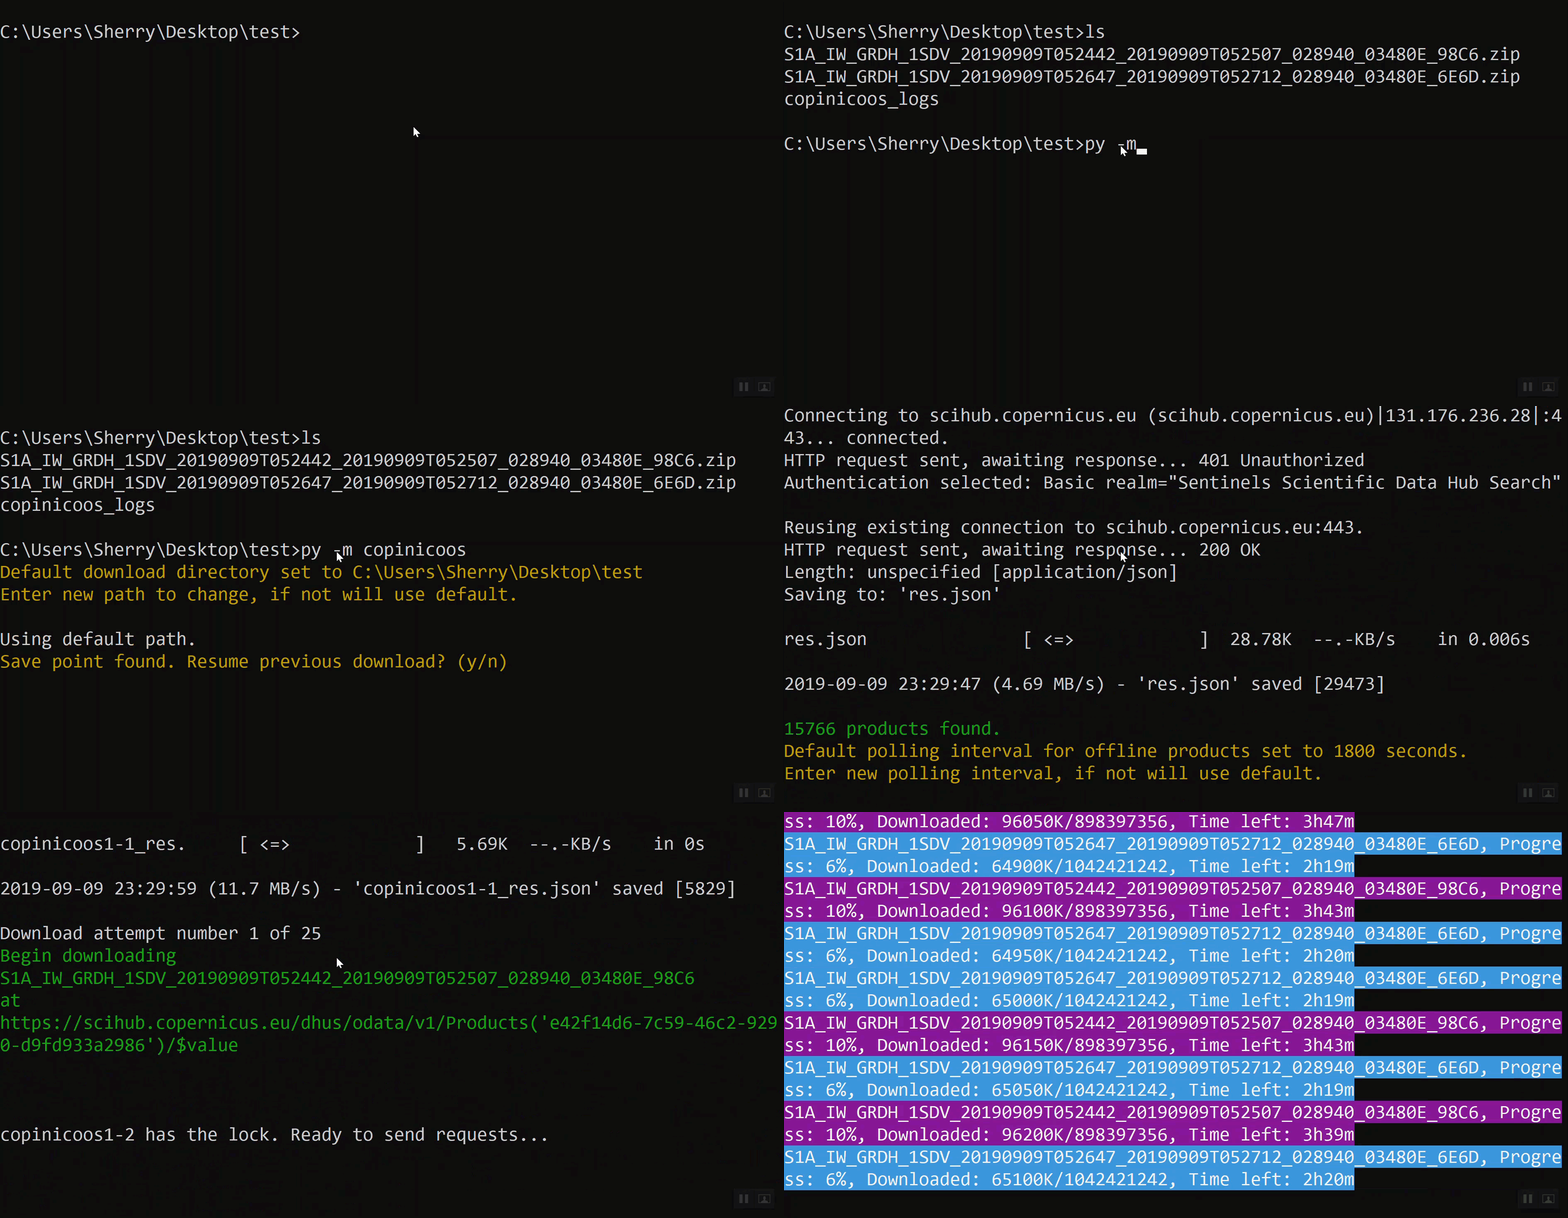
Copinicoos
Copinicoos is a Copernicus satellite image download manager.
Copinicoos can …
- Automate the download of all results in a search query.
- Download in parallel processes, for faster downloads.
- Manage polling for offline products.
- Stop and resume downloads, anytime!
Install
pip install copinicoos
Usage
Interactive Mode

To launch,
py -m copinicoos
And then follow on-screen prompt:
-
Enter Download Directory. Where products will be downloaded to. Entering nothing will default to current directory.
-
Enter number of Corpernicus accounts. Each account will initialise 2 parallel download processes.
-
Authenticate accounts by entering login credentials.
-
Enter query. This can be obtained from Copernicus Open Hub
Request Done: ( ... ). Just copy that whole string. -
Enter Polling Interval. Entering nothing will use default of one poll every 30 mins.
-
Enter offline product download retries. Entering nothing will use default of 24 retries. That is half a day’s grace (for default polling interval of 30 mins) for the product to be online before moving on to the next product.
Resume download

Again, launch
py -m copinicoos
And then follow on-screen prompt:
-
Enter download directory containing
copinicoos_logs. Or, if current working directory hascopinicoos_logs, entering nothing will resume download from current working directory’s savepoint. Savepoints are stored insidecopinicoos_logs. -
Agree to resume download
-
Enter Polling Interval. Entering nothing will use default.
-
Enter offline product download retries. Entering nothing will use default.
Argparse Mode
This mode is so that copinicoos can be called from a script.
All options:
py -m copinicoos <subcommand> -d <download-location> -r <offline-retries> -p <polling-interval>
Subcommand:
-
resume
-
fresh
When any of the optional options: -d, -r, -p are omitted copinicoos will fall back to using default values.
Default values are
-d, --download-location : the current working directory
-r, --offline-retries : 24 retries
-p, --polling-interval : 1800 seconds, or 30 mins
resume
py -m copinicoos resume
Resume download from savepoint in current working directory.
py -m copinicoos resume -d <download directory>
Resume download from savepoint in <download directory>.
fresh
py -m copinicoos fresh <query> <credentials>
Start a fresh download.
Input can be read from a text file by affixing @ to file name eg.
py -m copinicoos fresh @query.txt @secrets.json
eg. Inside query.txt
( footprint:"Intersects(POLYGON((91.45532862800384 22.42016942838278,91.34620270146559 22.43895934481047,91.32598614177974 22.336847270362682,91.4350291249018 22.31804599405974,91.45532862800384 22.42016942838278)))" ) AND ( (platformname:Sentinel-1 AND producttype:GRD))
eg. Inside secrets.json
{
    "u1":"username1",
    "p1":"password1",
    "u2":"username2",
    "p2":"password2"
}
Note: " has to be escaped, ie \", if parsing directly to the cmd.
For more details:
py -m copinicoos --help
Logs
Logs can be found in a folder named copinicoos_logs in the same directory where products are downloaded to. Manually deleting copinicoos_logs will restart the download.
A summary of finished downloads can be found in copinicoos_logs\WorkerManager.log. You can check the download status (SUCCESS, FAILED or OFFLINE) of each product in this log file.
Resume points are saved in <InstanceName>_progress.txt
Development
Clone the repository.
git clone https://github.com/potatowagon/copinicoos.git
cd to where setup.py is and
pip install -e .[dev]
This installs the dependencies needed for the development environment found under setup.py extras, and runs copinicoos from the dev enviroment, which is to run the code in this repo. All changes are automatically reflected in the dev enviroment.
Source code is in copinicoos\copinicoos
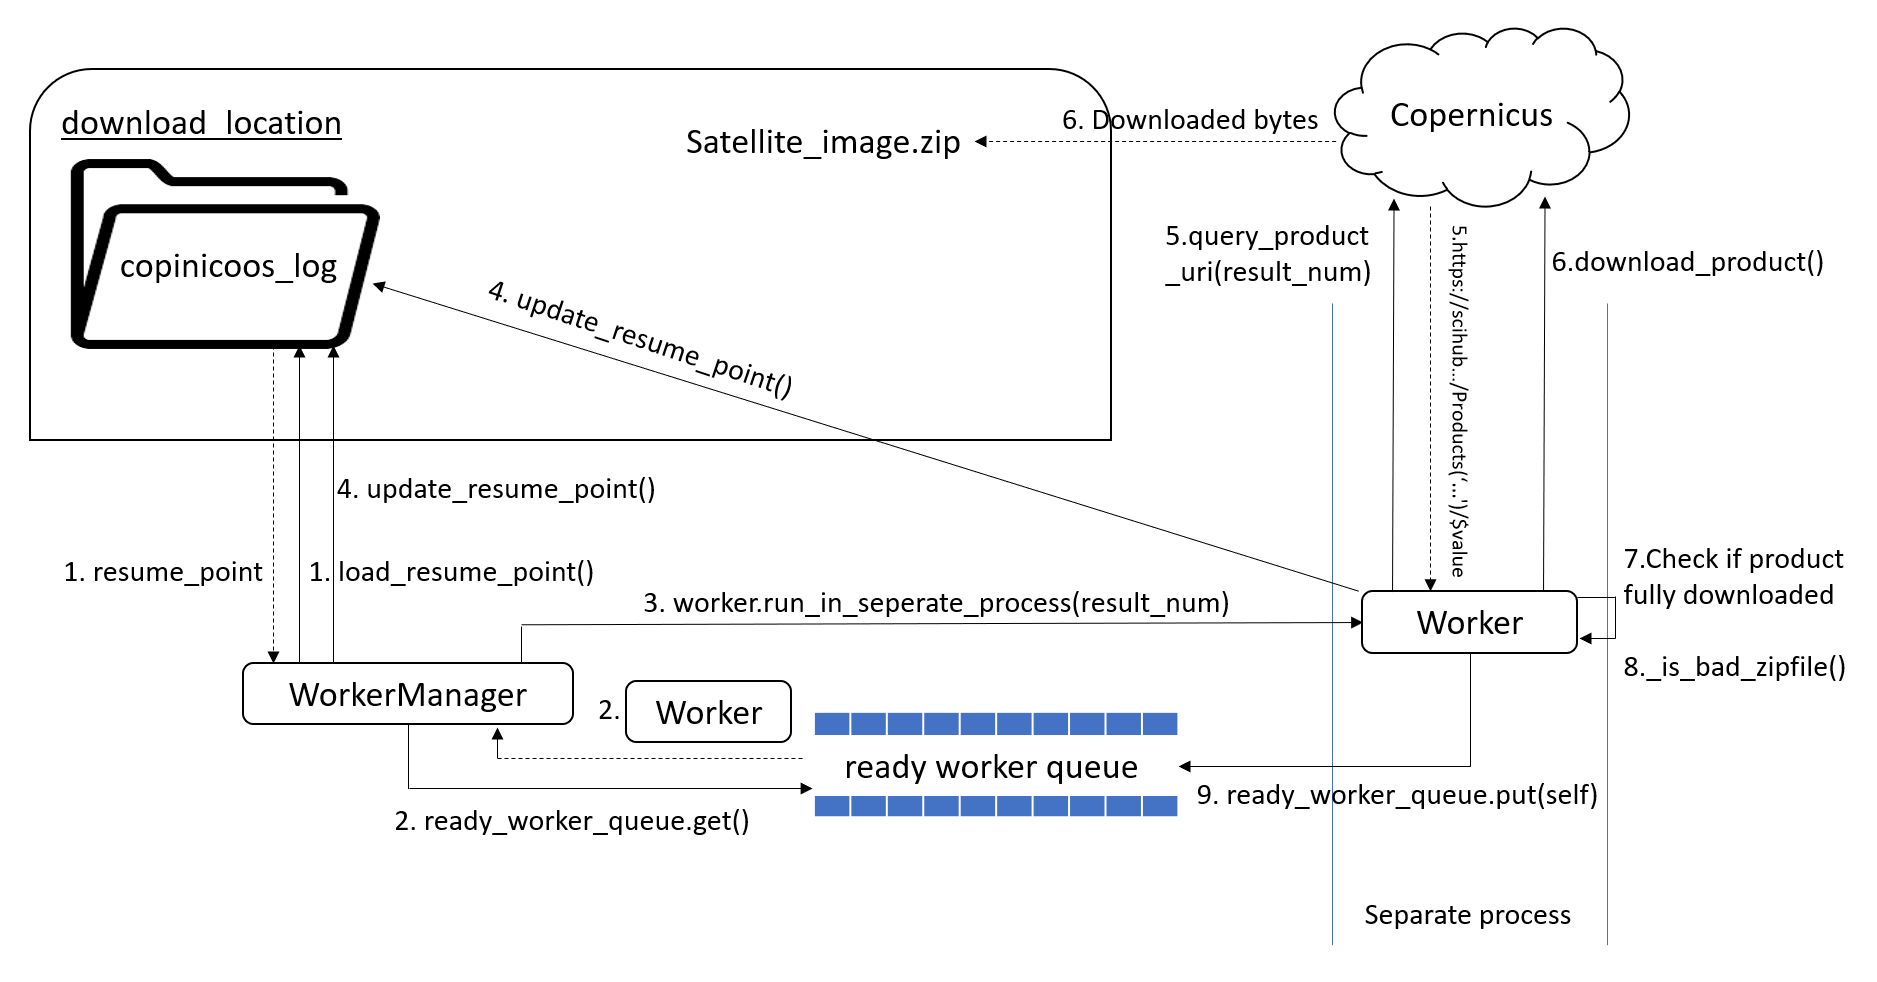
Architecture
Initialise and Setup

Note: Step 2. only happens in resume mode.
Running workers

Steps 2. to 9. repeat until all result numbers in the search query have been assigned to a worker.
Testing
Tests reside in the tests/ folder. Uses pytest framework.
Some unit tests need credentials to run. Due to security reasons, the account credentials used for testing are not commited to git. First, create test data with credentials.
tests/test_data/secrets1.json
{"u1":"username1","p1":"password1"}
tests/test_data/secrets2.json
{
    "u1":"username1",
    "p1":"password1",
    "u2":"username2",
    "p2":"password2"
}
To run all unit test cases
pytest -m "not e2e"
To run end to end test
pytest -m "e2e"


